
The Exit Pages is one of the basic settings of your campaign because it defines in which pages of your website, the campaign will be triggered.
By default, the campaign will be triggered on all pages of the website, which means that visitors will see the campaign no matter the page they're exiting from.
In many cases you'd want to target specific visitor segments with tailored messages based on the page they're exiting from.
The Exit Pages setting is split into two sections: Include and Exclude.
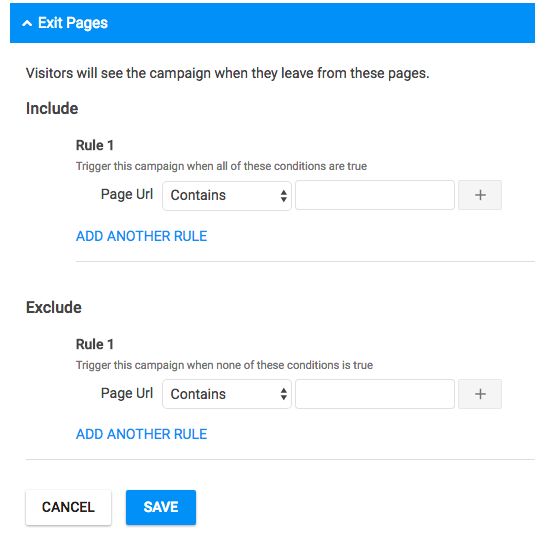
Within the Include and Exclude section you can create one or more rules to specifically specify the pages of your website that you want the campaign to run.
Here are a few examples to help you understand how to use the Exit Pages setting.
1. Show campaign to all visitors
If your intention is for all visitors to see the same campaign, no matter where they exit from, then just leave the default settings.
2. Show campaign to specific visitor segments
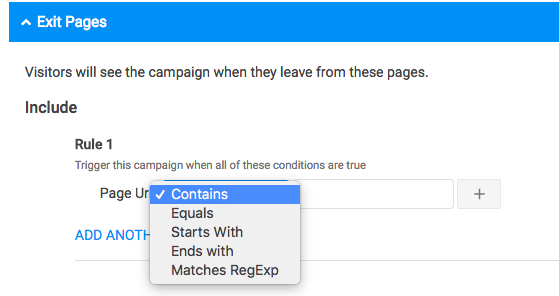
To select the pages that the campaign should trigger on, you should create one or more rules using the available options in the Include or the Exclude section:
Example: Show campaign only to visitors that exit from a specific page
Let's say that I'm running campaigns on www.exitbee.com, and I created one that I want to show to visitors that are leaving from the Features page www.exitbee.com/features.
The Exit Pages setting will look like this:

Notice that I'm not using the full URL of the page, just what follows after the domain name.
Examples: Show campaign to visitors leaving from a group of pages
Maybe this is the most commonly used setting to run a campaign, and here are a few examples.
Let's say I'm running a fashion shop and I want to target visitors with specific campaigns based on their behaviour, like:
- show campaign only to visitors leaving from a page with shoes. I'll use the "contains" option like:

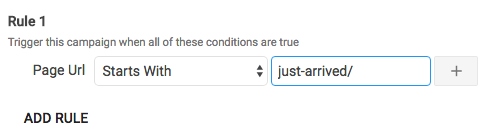
- show campaign only to visitors that are leaving from the "just arrived" section of the website
3. Combining rules
In many cases it makes sense to use more than one rules to specify the exact pages that the campaign should be triggered on.
If my fashion shop has products for both men and women, I may want to create separate campaigns to make them more relevant to the visitor. Or maybe even break them down by brand.
Using the plus button means that the campaign should trigger only when every condition is true.
Adding a new rule means that the campaign should trigger when any of the rules is true.
Example: Show campaign only to visitors that exit from the men's section of shoes and only for Nike shoes
In this case the page URL includes men and shoes and nike. The Exit Pages setting will look like this:
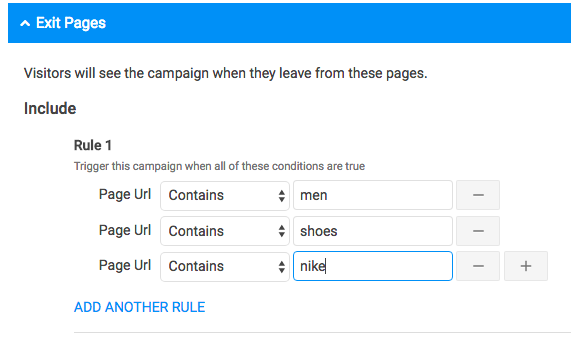
This means that the URL of the page has to include all three words: men AND shoes AND nike. So the campaign will be triggered on the page exampleshop.com/shoes/men/nike but not on exampleshop.com/shoes/men.
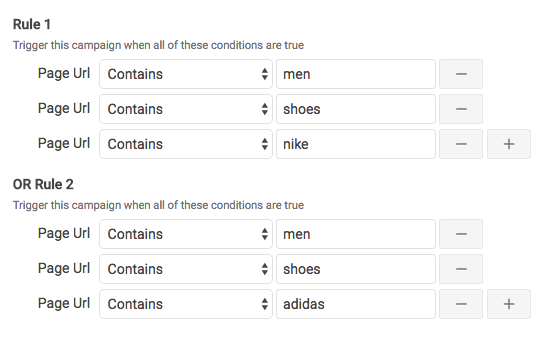
Example: Show campaign only to visitors that exit from the men's section of shoes and only for Nike or Adidas shoes
In this case the page URL includes men and shoes and nike or adidas. I'll have to add a second rule and the Exit Pages setting will look like this:
The two rules are independent from one another. This means that if one of the two rules is true then the campaign will trigger.
The conditions within each rule should ALL be true for the campaign to trigger.
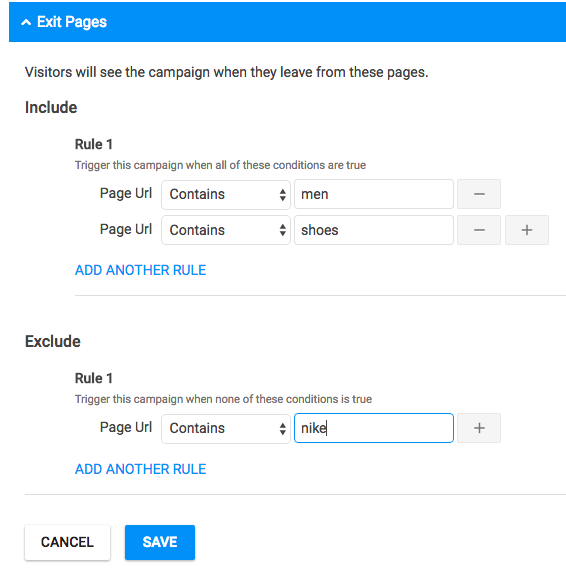
Exclude Pages
You can use the same logic to exclude the pages that you don't want your campaign to trigger.So, if I want to run a campaign on all men shoes except from the Nike shoes, then the settings will look like:
Conclusion
Combining conditions and rules lets you target specific visitors with tailored messages and this is a proven way to get more conversions.